A compilation of work from several projects accumulated during my academic year on the University of Brighton’s Illustration BA (Hons) course at Level 4 (2023 – 2024).
Project: World Building
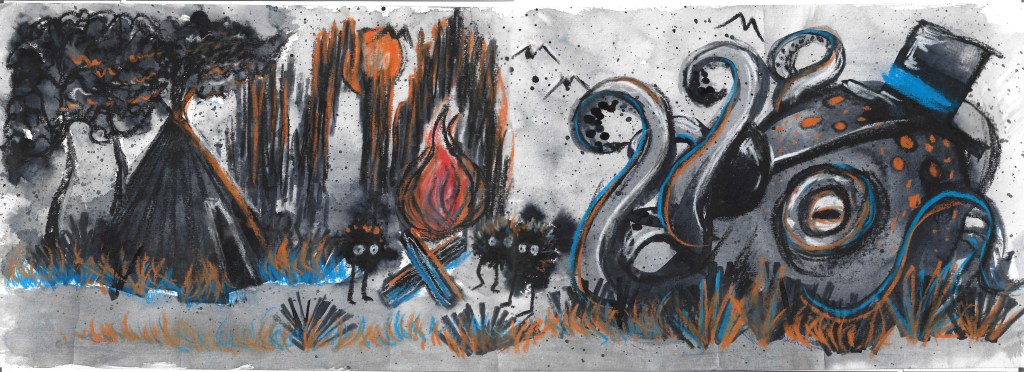
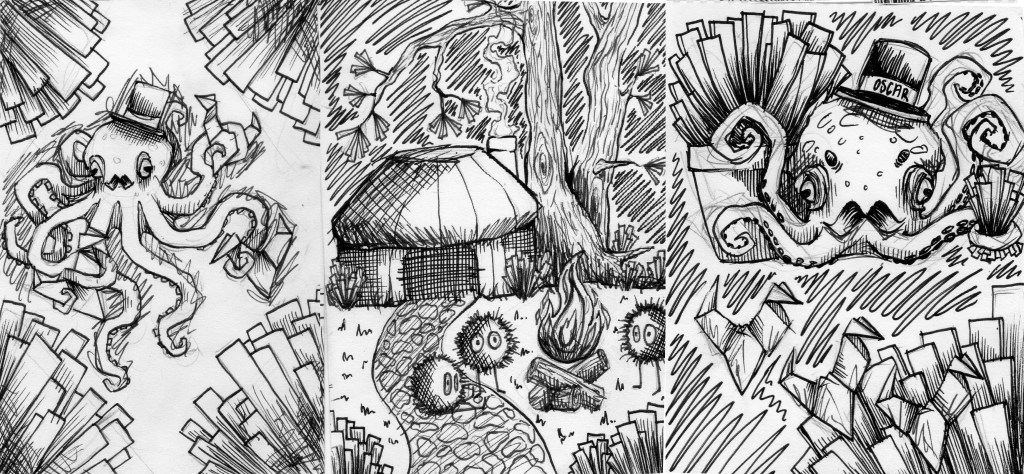
For this project I had to create a building or living thing for a 3D world. I constructed an octopus wearing a top hat and sporting a moustache. He was added to the nearest group’s world. He was made out of cardboard, masking tape, string, tissue paper and sharpie markings. The world itself featured a lot of sprite-like creatures, angular paper and straw structures, huts, trees, plants and origami birds.

(cardboard, paper, tape and pens)
(charcoal, pastels and ink)
The 3D world project really brought me back to when I used to junk model as a kid. It took away my ability to be so tense about the creative process. I found it easy to imagine a narrative about this world as there was such a range of elements.
For the banner based on my 3D world, I used a multitude of mediums including charcoal, oil pastels and ink. The tools I used to create the image consisted of using my own fingers, cut out pieces of cardboard, tissue paper and some brushes. I found the process quite unusual for me and it was definitely out of my comfort zone. I worked with materials that I’d never worked before. But I liked the play with textures. I also found the process of creating a narrative enjoyable.
(fine-liner pen)
(watercolours and fine-liner pens)
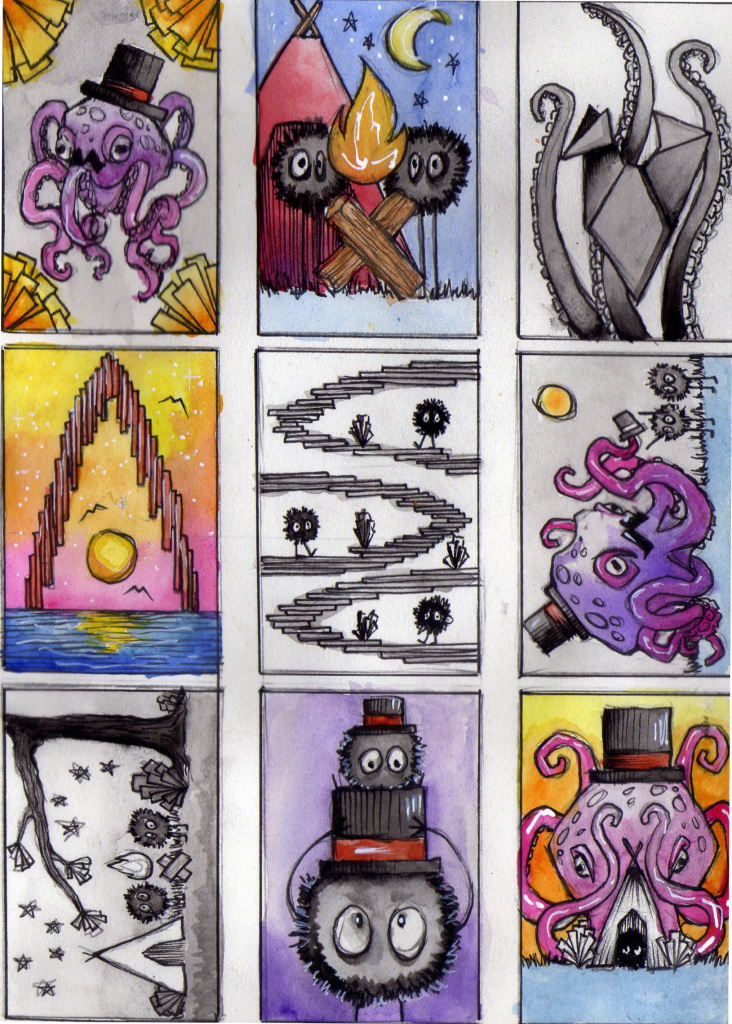
Here is where I was first introduced to making thumbnails to plot out composition, colour and characters from the 3D world. I worked quickly using fine liner pens and watercolour. I learned the importance of sketching and thumbnailing quickly at the offset of this project.
(watercolours and fine-liner pens)
The second part of this project required me to create 6 panels narrating the 3D world of another group without words. Here I map out the main elements of the world, such as characters, environments and what mediums I would like to use for the panels. This gave me a good idea of what I wanted the various elements to look like. I found this really immersive and a good way to become connected to the world that had been created. The mind map also helped bring life to the various characters and elements from the world.

(fine liner pen and mechanical pencil)
(watercolour, fine-liner pen, paint pen and dried flowers)
I created these comic panels using a mixture of fine liner pens, watercolours and masking fluid. I decided to make the branches of the tree pop out from the main panels, adding a nice layer of perspective. I used some real dry flowers to frame the corners of the panels and used black posca-pens to outline the panels in black.
This project made me realise how much I enjoyed working on sequential art and telling a narrative. I decided after this project that creating illustrative and narrative panels would be something I’d like to explore further in the future.
Project: Cartographers of Intrigue
For this project my task was to create 3 posters for local museums. I attended Worthing Museum and acquired a series of photos I found interesting and wanted to work from. I sourced some images from the National Museum of Natural History online as well.
(please click on an image to see full resolution)
(Acrylic paint and fine-liner pen)


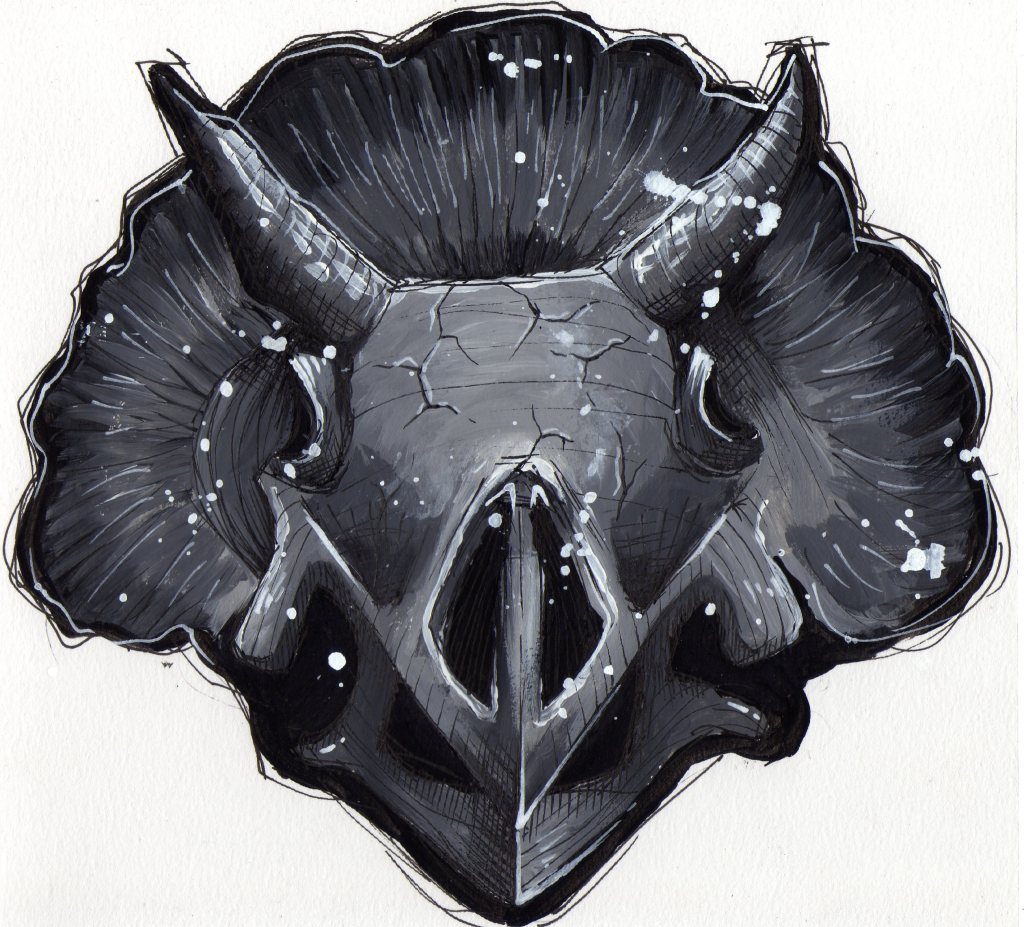
(Acrylic paint and fine-liner pen)
The curving shapes and intricate details really drew me to the Triceratops skull and the human skeleton. For the skeleton, I used watercolour and ink. For the skull, I used acrylic paints and fine liners for detail. I was learning how to create rough but refined paintings quickly, letting go of fixating on every detail.
The statue really fascinated me. There was no information on the origin of the statue but I enjoyed sketching it using acrylics and ink. I decided to be quite messy and expressive with my mediums. I liked how this turned out. Although I would’ve liked more time to refine.
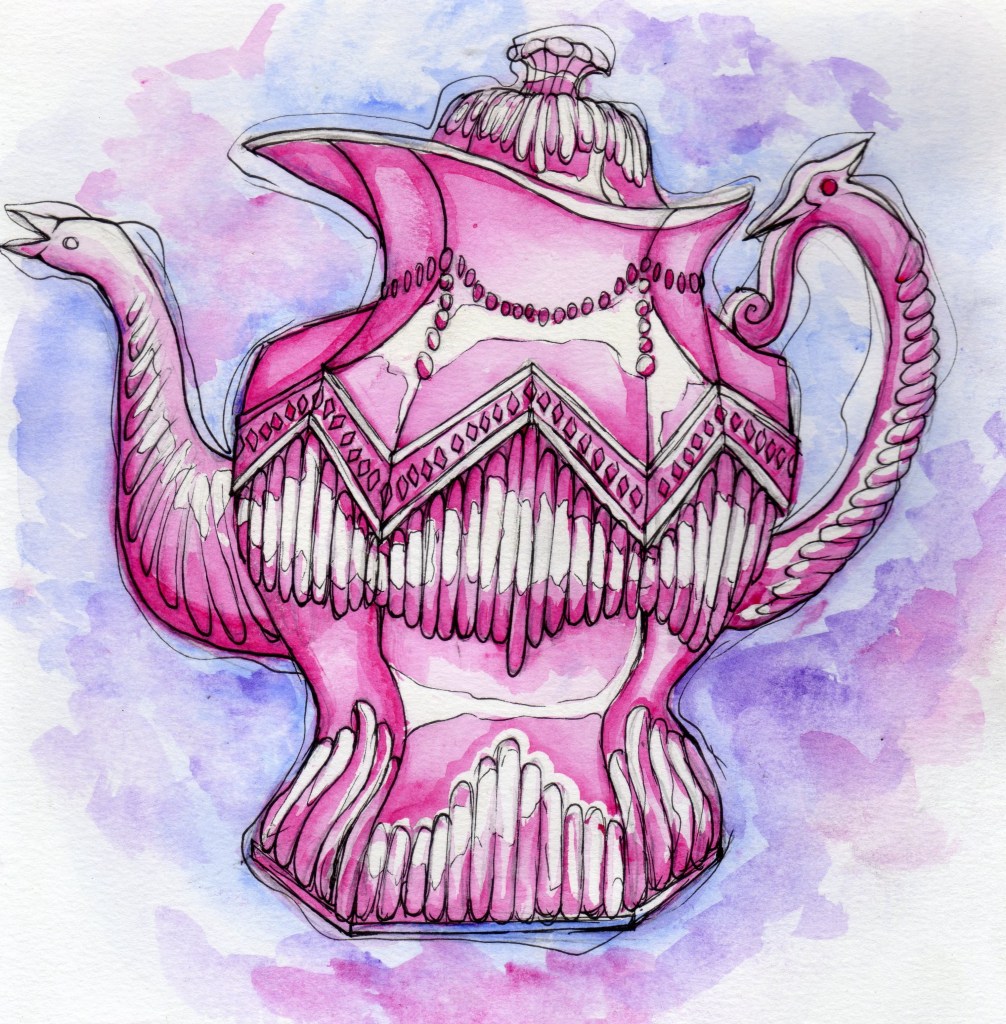
(watercolours and fine liner pen)
I found this tea-pot to be quite a challenge as I wasn’t very comfortable working with such strong angles and straight lines. However, I was pleased with the outcome. I used watercolours, masking fluid and fine liner pens to achieve the drawing.

These were my 3 final poster designs. For the first, I decided to go with a clash between modern and neon and a traditional painted style. The second poster design was more experimental, abstract and stylistic. The 3rd was achieved by buying an old copy of a newspaper from the museum itself, and working in a collage-style with ink. I wanted more of an “old fashioned” feel to the third poster. All were A2 sized.
Project: When Worlds Collide
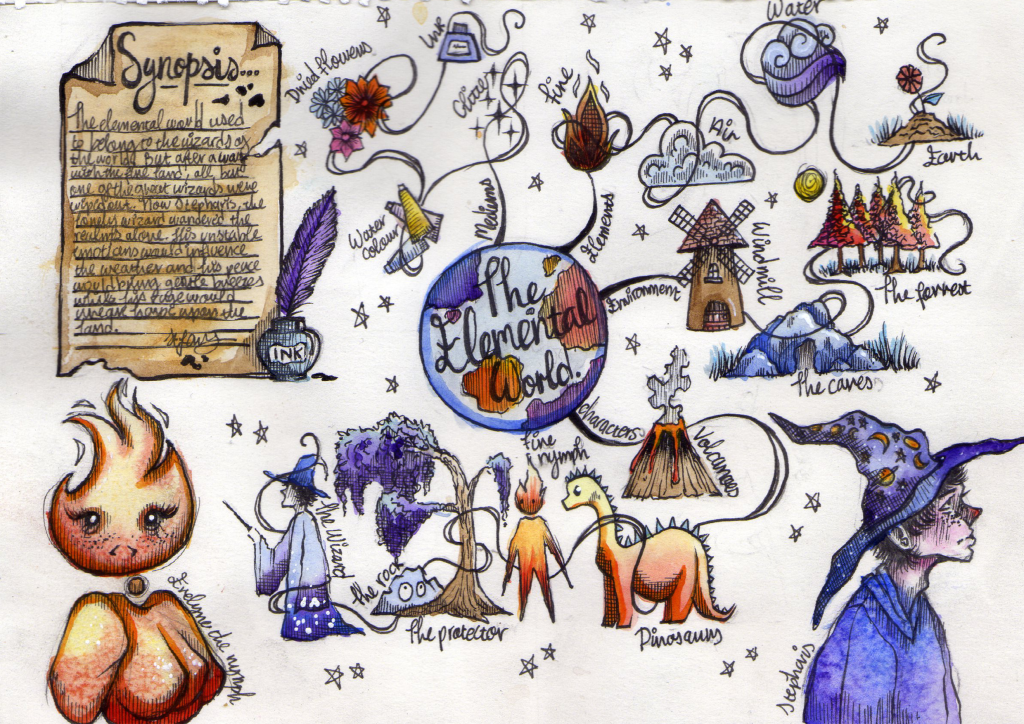
For this project, I had the choice of creating either a diptych or a short animation. So I decided to mix the two and I wanted to make an animated diptych. I chose two contrasting themes. The themes I chose were “gothic” and “music”. My first task was to come up with as many words as I could that I could associate to the two themes. Then I would rearrange words to create new ideas.

(fine-liner pen)
I created an illustrated mood board using the words of things related to the two themes, such as a skeleton, corset and gravestone for “gothic, and a gramophone, busker and sheet music for “music”. It was helpful to visualise the different visual components of the two themes and how they might fit together, it also helped me familiarise myself with how to draw unfamiliar objects.
(please click on an image to see full resolution)

(fine-liner pen)
(fine-liner pen)
(fine-liner pen)
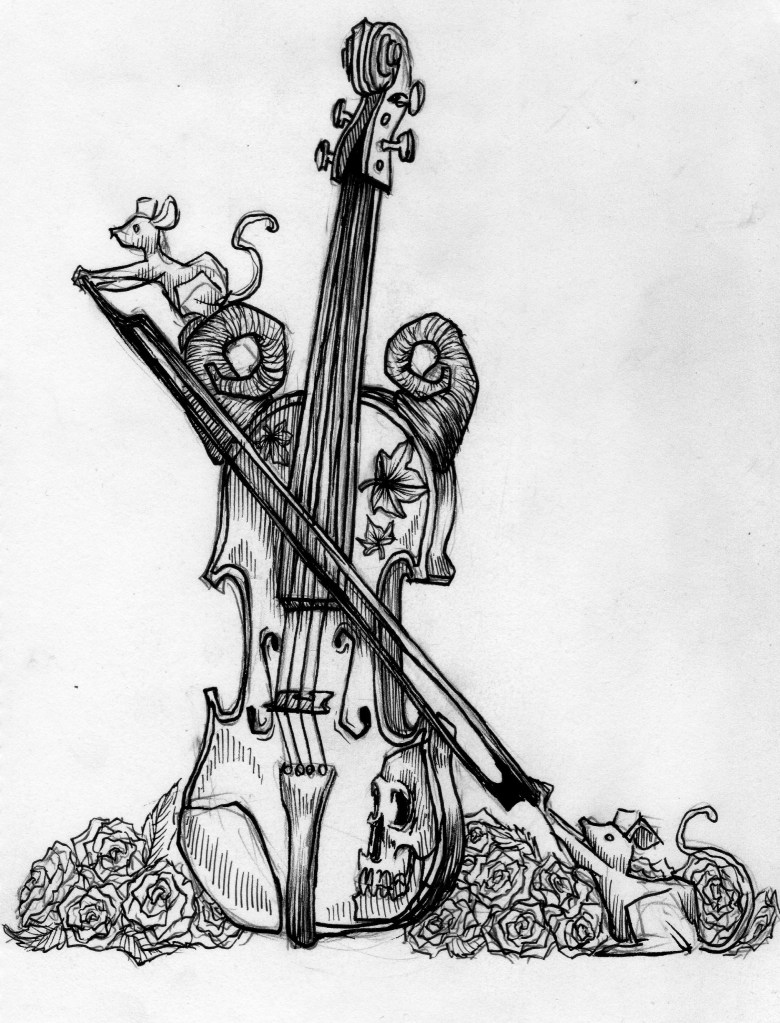
I started working on some rough drawings with some concepts; I thought the rats could be moving the bow across the violin strings, or perhaps the skeletons in the forest could be dancing.
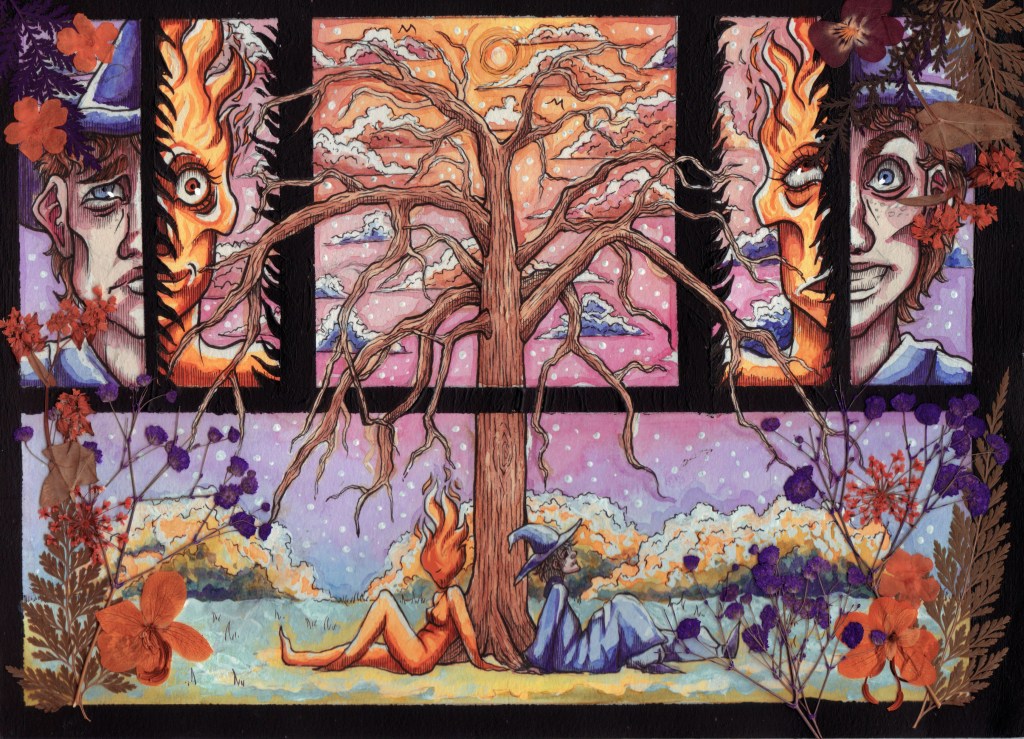
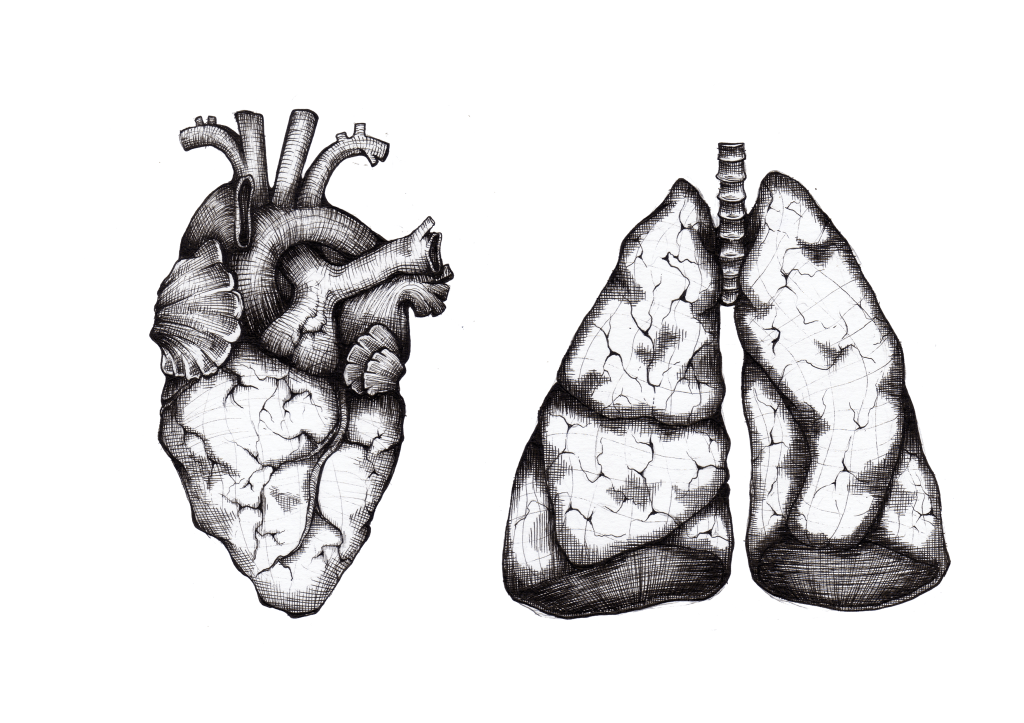
I liked the heart and lungs concept the most though, as I loved how the gothic nature of biology and anatomy could interact with music. I thought I could make the heart beat and lungs breath. I thought as well I could create somewhat symmetrical and complimentary diptychs.

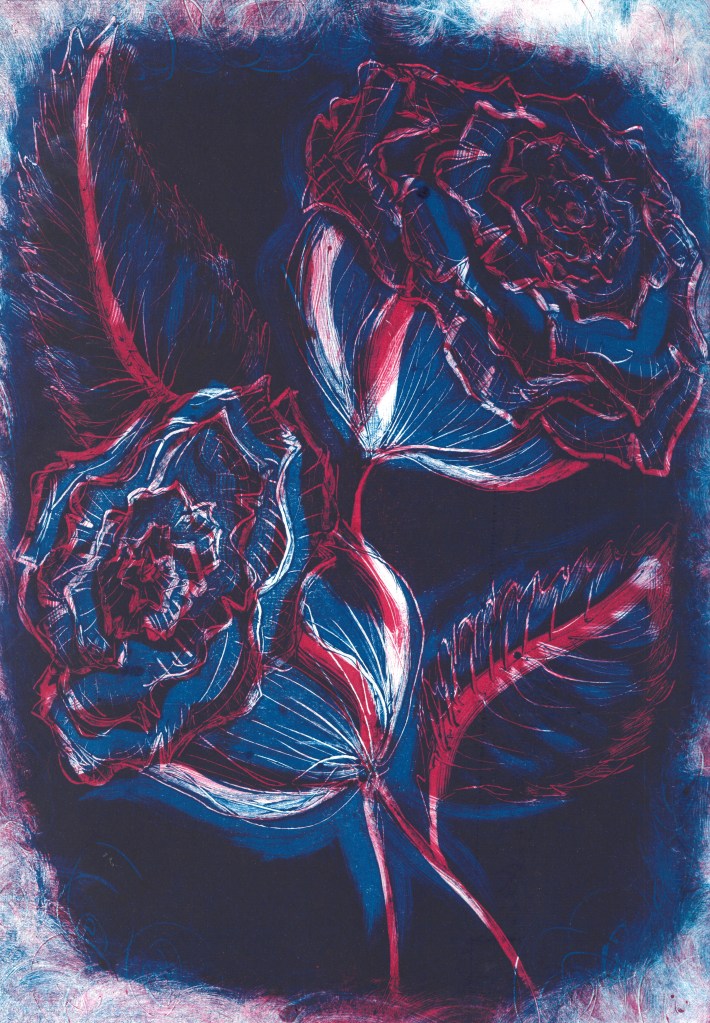
I got to try out lino and mono printing and I really enjoyed it. I decided to finely cut out the shape of a heart and lungs as I wanted to incorporate it into my diptych. I worked with black, blue and red paints for the mono printing and designed some rough roses. This was a good introduction to printing and I enjoyed it.

(lino printing, fine liner pen, digital photo collage)
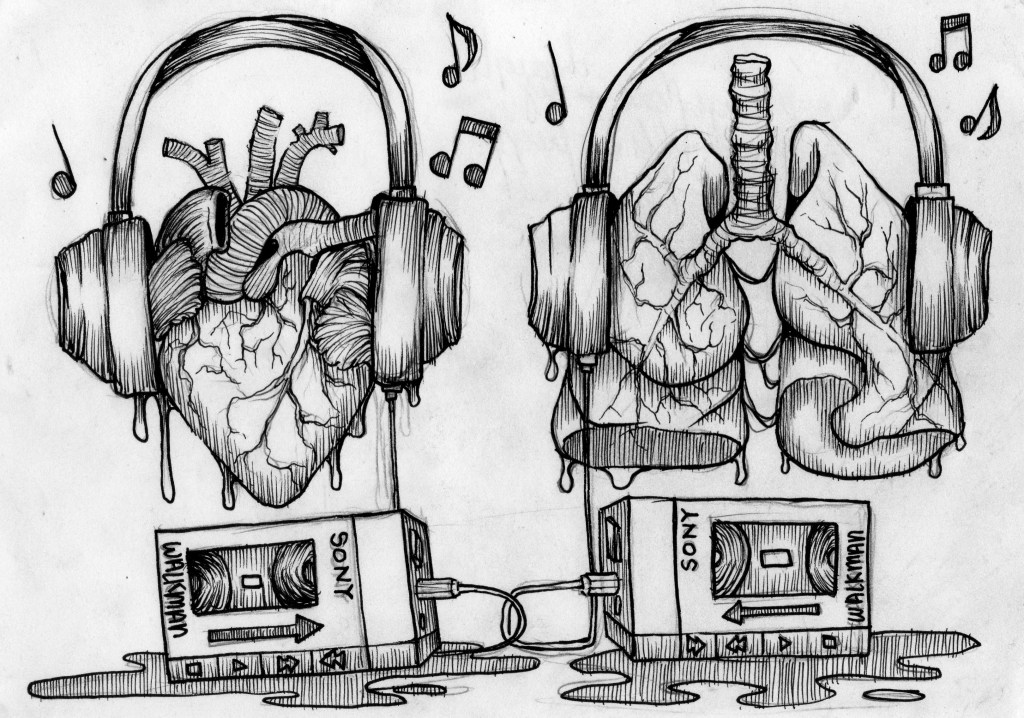
I started working with a medium I was comfortable with; I used fine liners and cross hatching to create the initial design of the lungs, heart, headphones and cassette player. I then went on to create a digital collage with meat and metal textures to create the “collage” versions, and finally I used watercolours to create the final design for the various elements.
I made two rectangular frames for the heart and lungs, placed them next to each other and then alternated the medium styles and scale of the elements on each frame to create a sense of movement. I also created some outlines of a heart and lungs during a printing workshop. I used this print as a background to the diptychs and also varied the scale and placement of the print to create an unsettling sense of movement.
Project: Reading the Signs
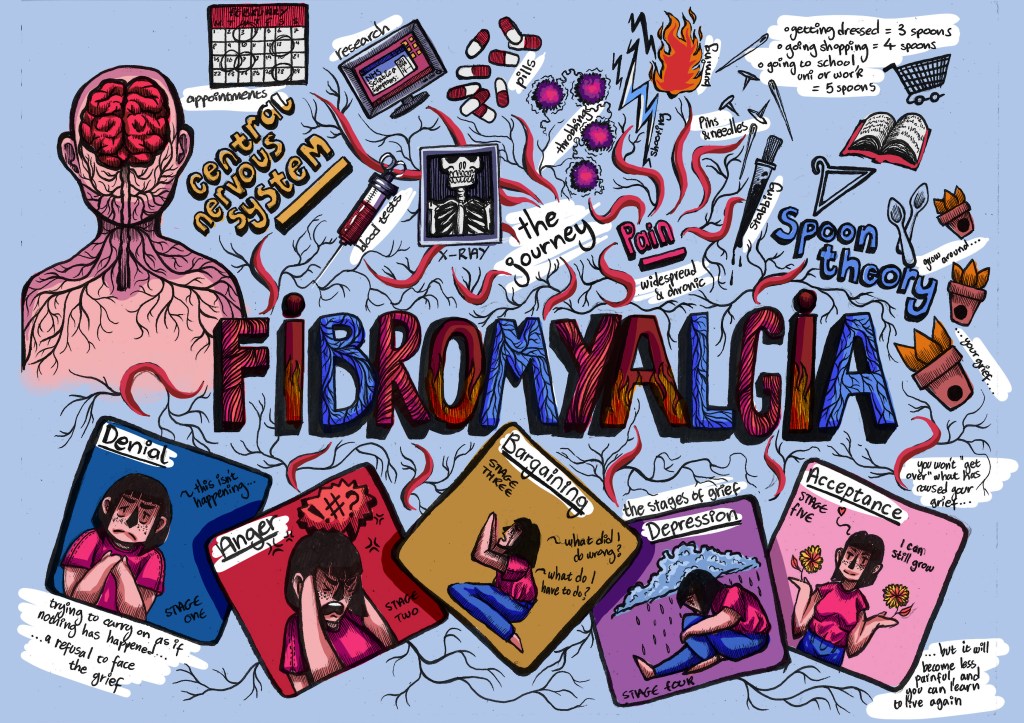
I had to choose a cause I wanted to work toward with this project. I chose the cause “Invisible Disability” and I focused on the condition Fibromyalgia, which I myself suffer from; so it was something important to me.
(fine liner pen and digital colouring)
I illustrated a mind-map to get my ideas and most vital information into a visual format. This really helped me organise my head when it came to tackling such a complex condition. The mind-map is broken up into the following: the journey of diagnosis, the types of pain experiences, spoon theory, the stages of grief and the central nervous system.

(fine liner pen)
The sketch on the left was a concept for an idea to customise clothing to communicate the struggles faced with the condition. A knife in the head to represent headaches, the chains are the feeling of being trapped in your own body, various paint splatters to represent the different types of pain and fragile tape to convey the delicate nature of the illness.
The thumbnails on the right were some cover ideas for the informative zine I wanted to make. I was mostly drawn to the “Rate your Pain” and the “It’s Getting on my Nerves” thumbnails. If I hadn’t made these thumbnails, I wouldn’t have had the chance to include “It’s Getting on my Nerves” in my final design; again showing the importance of testing out your ideas in a quick and concise way.

I signed up for screen-printing workshops and took the opportunity to make a screen-print of something I wanted to use in my project. I decided to try and bring one of my thumbnails to life. I did find the workshops to be quite difficult as I wasn’t anticipating the level of physical demand. I was unable to use the light-box to work on the various layers as there was no chair available. So I had to work on the layers on a normal table with very little visibility, therefore there are some gaps between the colours. But considering my difficulties, I was pleased with how it turned out, especially for my first screen print.
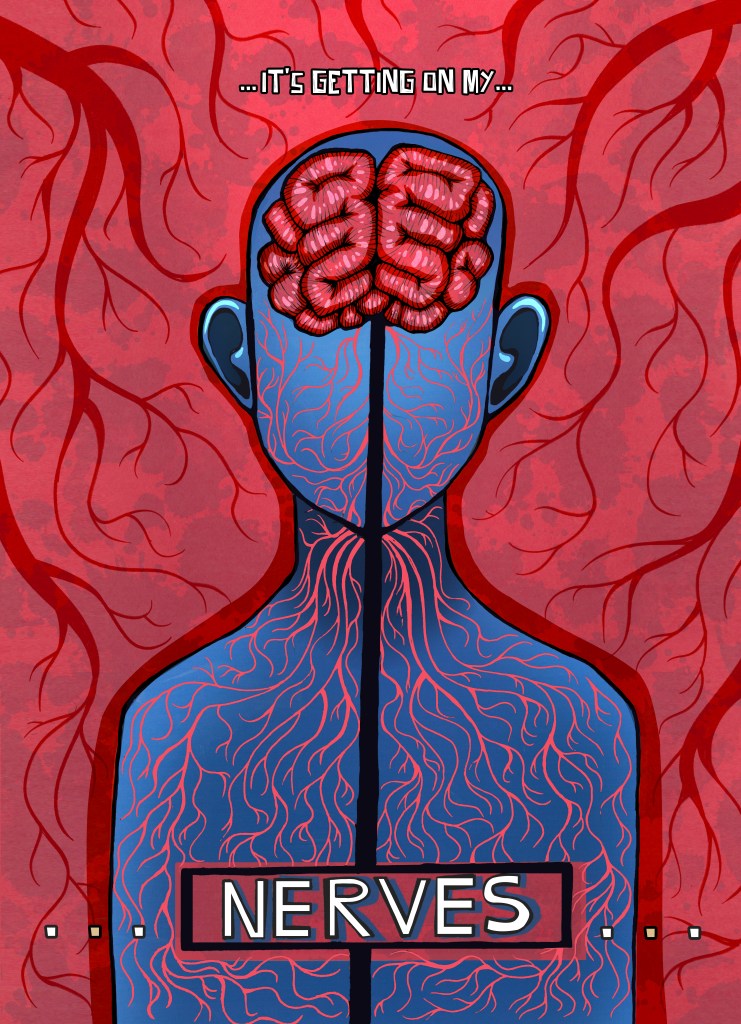
This was the final version of “It’s Getting on my Nerves”. I scanned in the original screen print and imported it into Photoshop, where I corrected the gaps between the layers. I played around with gradients, lighting and the addition of nerves around and inside the head and torso. I felt like they added a feeling of impending pain and distress, like no matter what you do, you can’t escape central nervous system pain.
Project: Final Independent Project
My independent project was the opportunity I was waiting for since my first work with panels and sequential art. “The Cosmic Whale” was the title of a pre-written poem that I wrote the year before, which was a sentimental story about belonging, family, loneliness and fear. I wanted to create a visual narrative using panels, which will follow the verses of the poem. The words of the poem will be added digitally in post-production.

(fine-liner pens and mechanical pencils)
I started sketching out my ideas and layouts for the comic-pages. I wanted to fit one to two verses on each page. These sketches were done quite quickly and they really aided me in creating the final layout. I also wanted to get an idea of where I would place the text. I wanted to make sure that the text didn’t distract from the imagery or vice versa.
(please click on an image to see full resolution)
I really wanted to do make some textures for this project, as I was planning to use various textures on overlay-layers to create a traditional feeling for the comic, even if composed digitally.
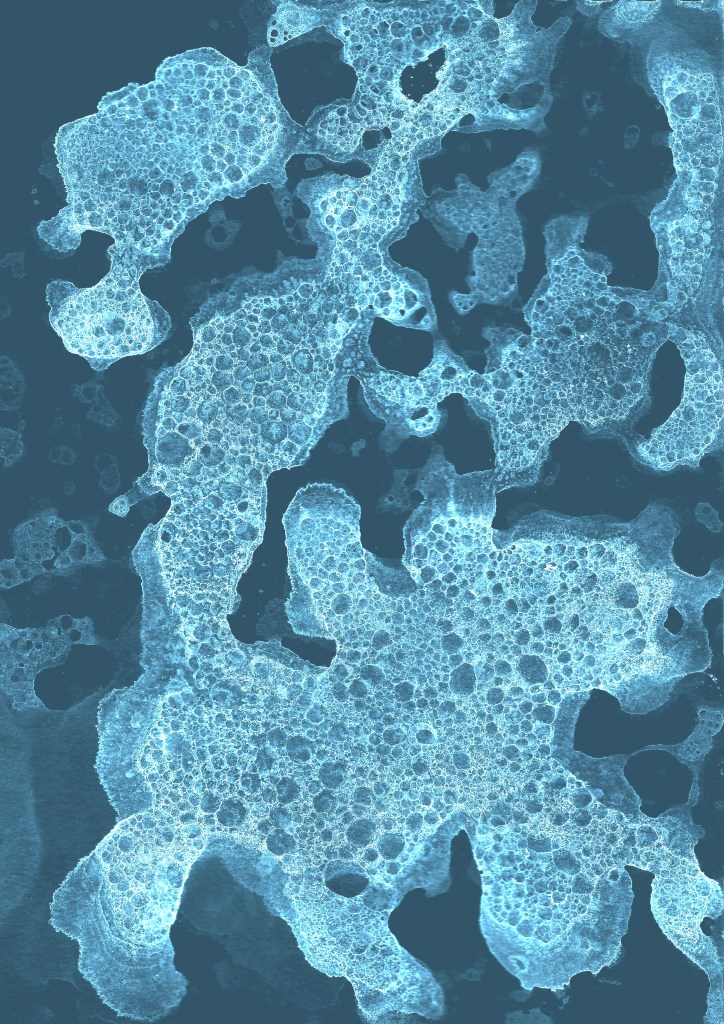
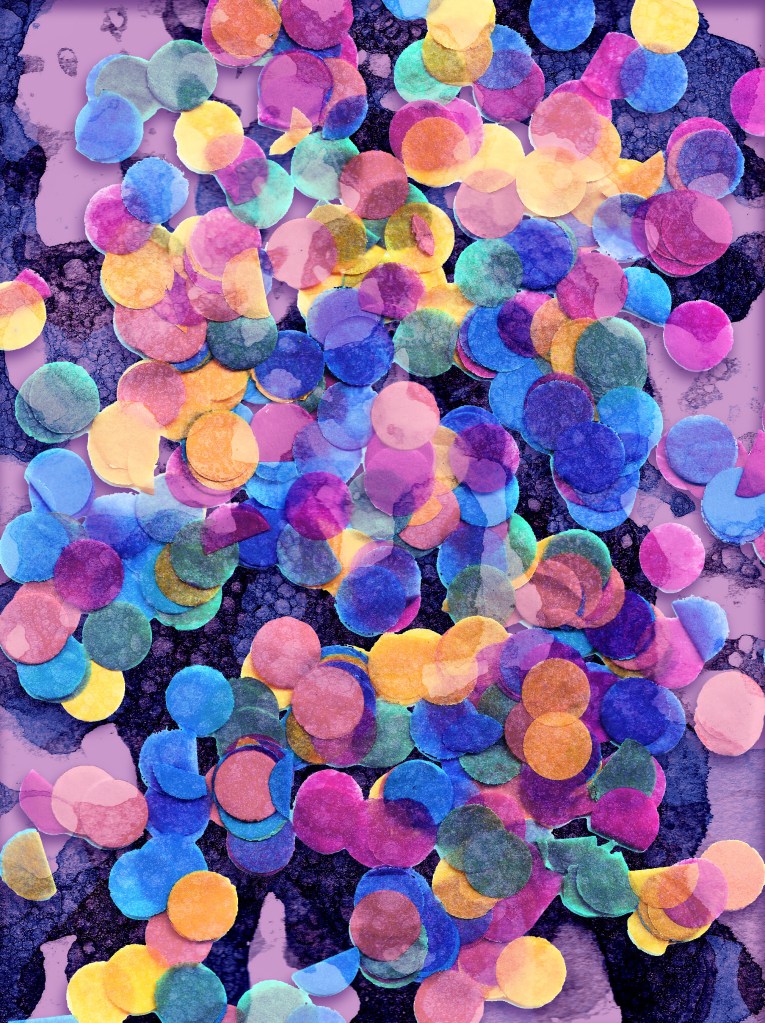
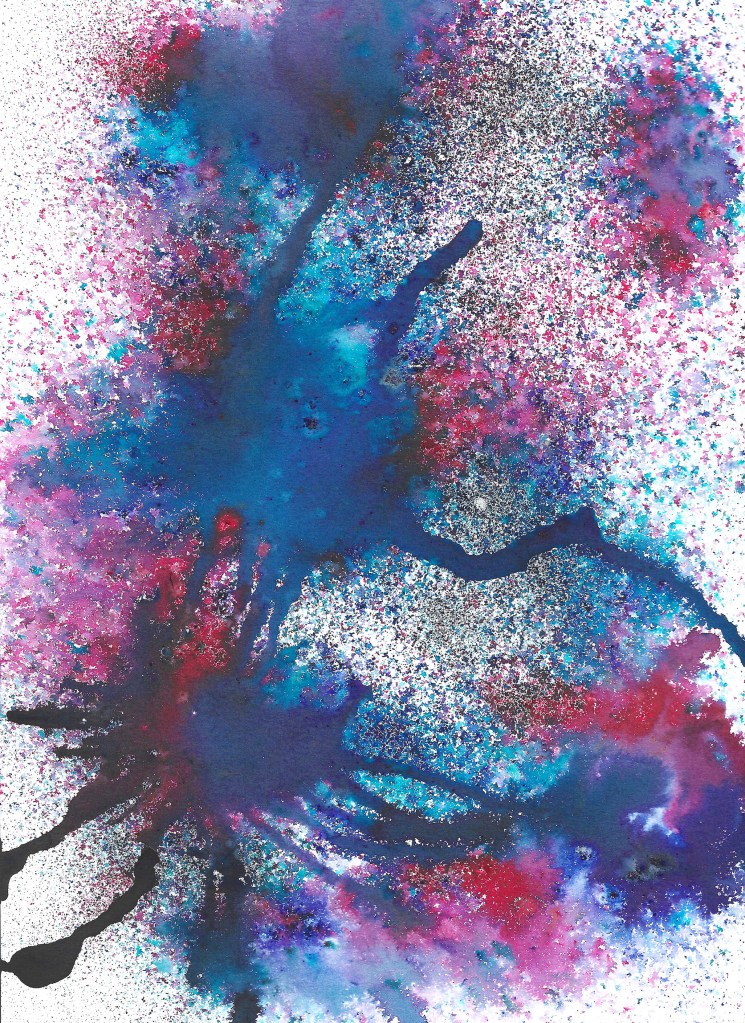
I had a lot of fun experimenting with just making visual textures, something I hadn’t really delved into all that much. I was reminded of an art project I did as a small child, where you’d put food dye and fairy-liquid into water. Then you’d put the tip of a straw into the water and blow. Colourful bubbles would form at the surface, and you could print these onto paper if you were careful with gently placing the paper on top. I did this but with black acrylic paint, then I scanned in the dried bubble prints and played around with digital editing. The image in the middle was made by simply dropping confetti onto the glass of my scanner. Then the image on the right was made using watercolour pigment powders and a spray water bottle.
These textures really were useful when digitally composing the final pages. They added a feeling of depth to the otherwise block colour backgrounds.
(fine liner pen)
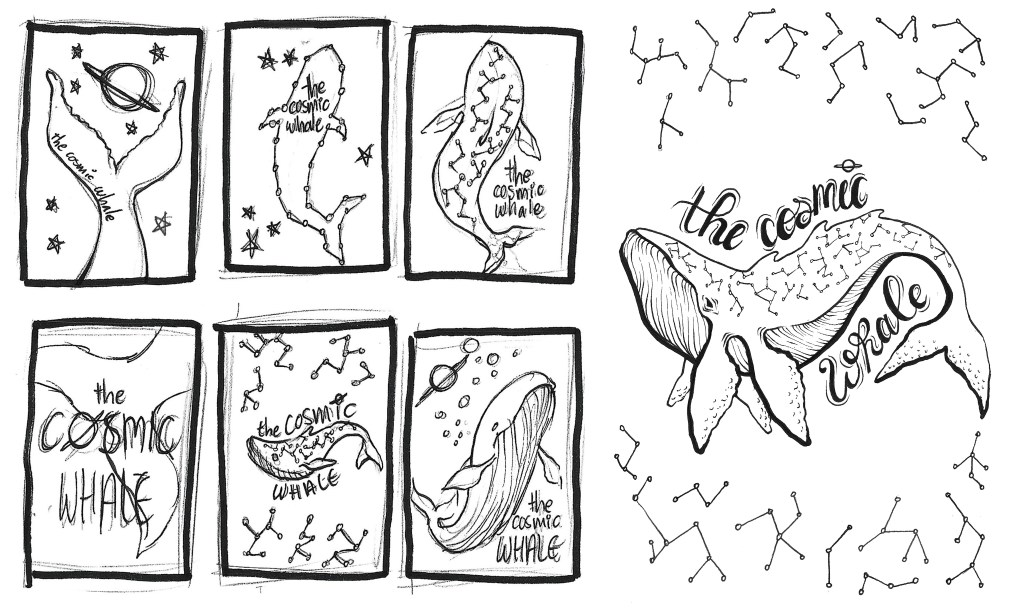
I sketched out some thumbnail ideas for my book cover in mechanical pencil and quickly lined with ink pens. This helped me get a good idea for what kind of layout, perspective and visuals I wanted for my book cover. The top left and bottom middle specifically drew my attention, however I ultimately ended up choosing the bottom middle to take further as a cover.
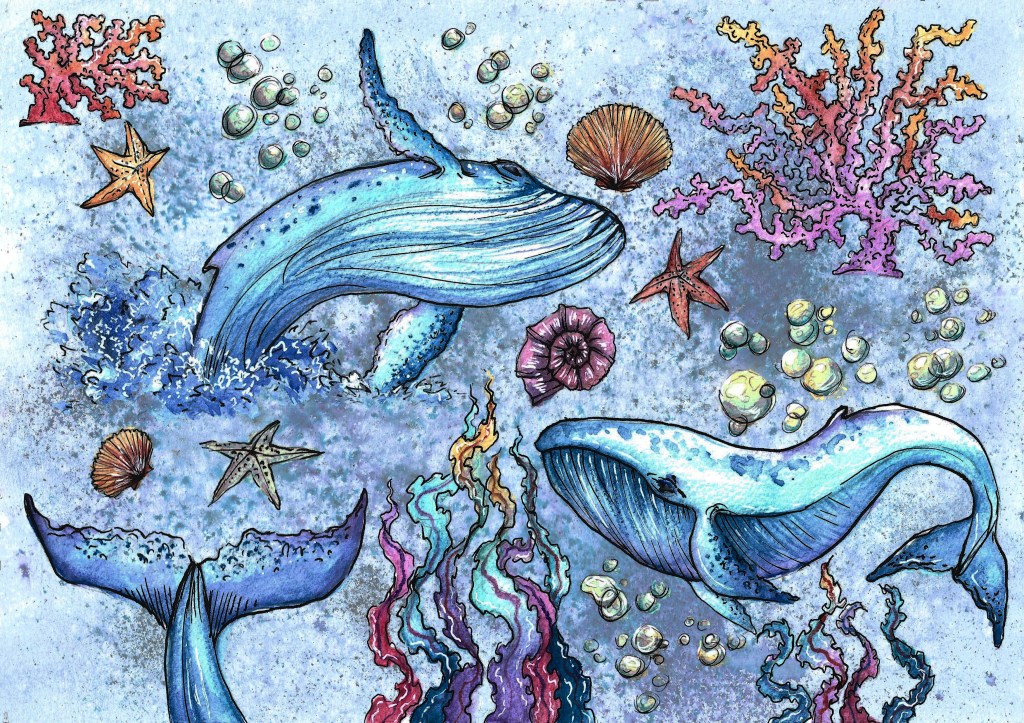
(watercolour and fine liner pen)
These are some water-colour sketches that I quickly made to get used to drawing various elements of the story. This was my first attempt at drawing a splash and bubbles, which I was feeling intimidated by initially. But doing these sketches made me feel a lot more confident to attempt to illustrate objects that I wasn’t so familiar with initially. I also got an idea for what kind of colour-schemes I was wanting to use.

(fine liner pen)

(watercolour, paint pen and fine liner pen)
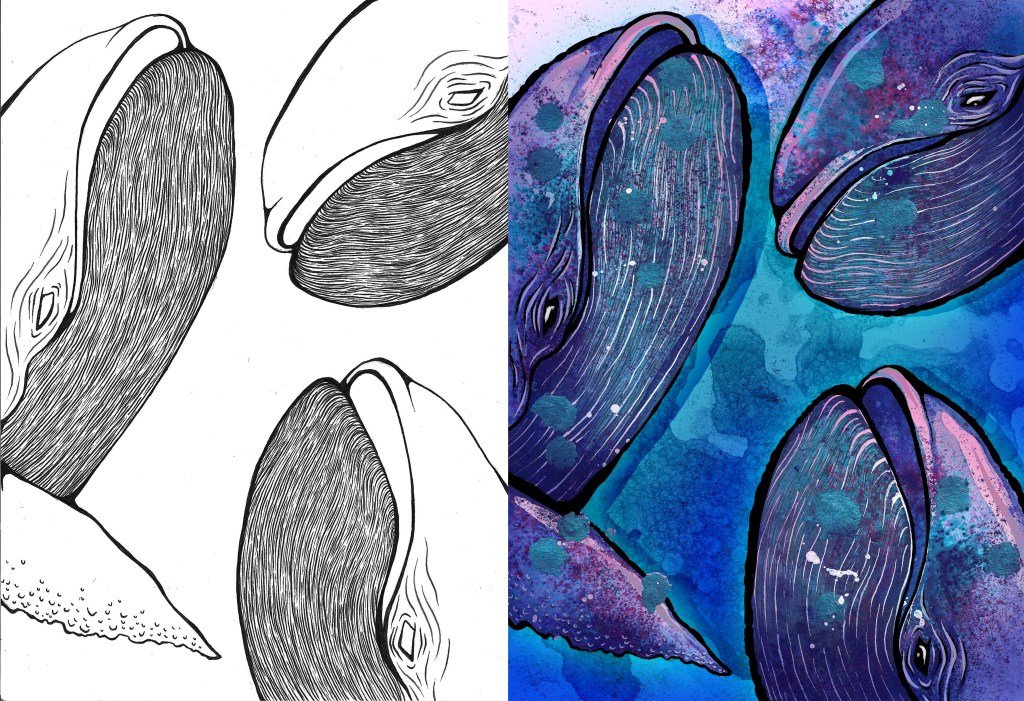
(watercolour, ink, paint pen and fine liner pen)
I started illustrating the individual elements in the comic in ink fine-liner pens. My plan was to create the individual drawings and then compose them in post-production in Photoshop so I could have more control over colour, position and scaling changes. I also really want to mix a lot of images, elements and textures together, so creating the images individually seemed like a good course of action.
After I’d finished colouring all of the different images of characters and environmental objects, I scanned them into Photoshop and composed the pages from there. This allowed me to have more control over resizing, layout and adding effects.
I heavily utilised a lot of digital techniques to achieve the bright and magical feel to the comic. I added a lot of glowing outlines, made custom brushes and implemented all of the speech boxes.
I also used various blend modes on layers that I’d put the background textures into, this would help incorporate more traditional elements into the comic, so as to not have it look “too digital”.
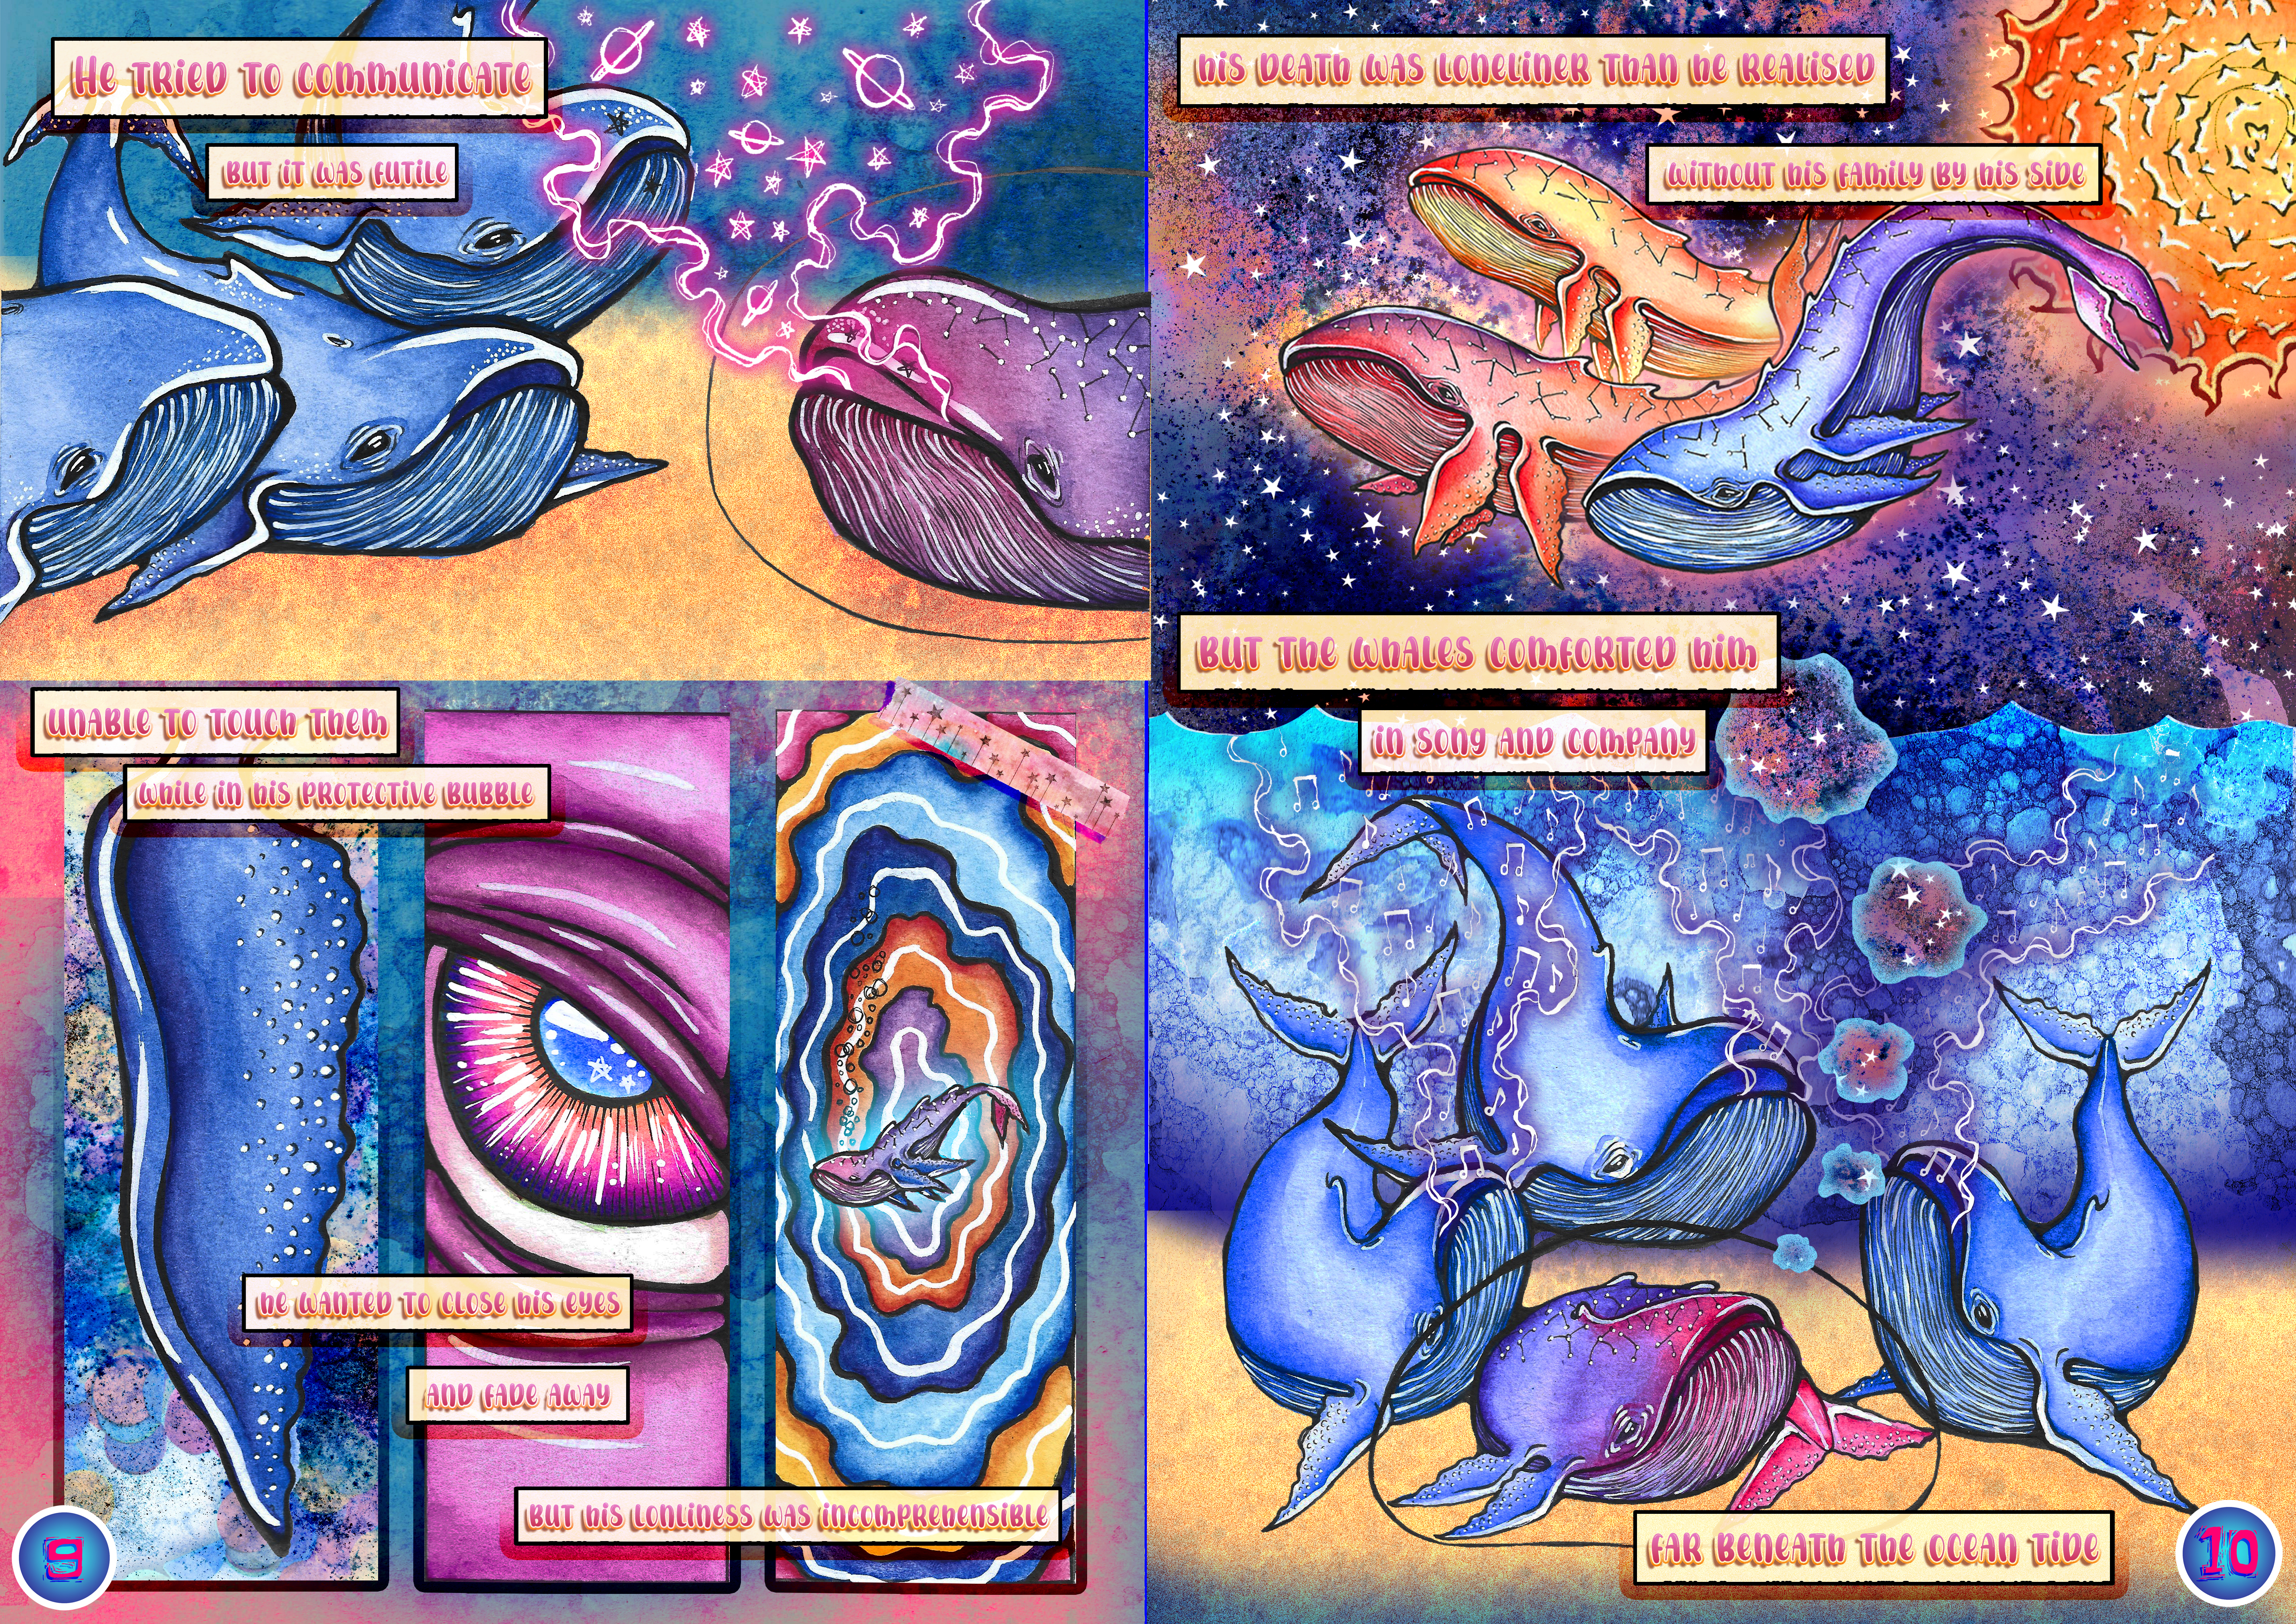
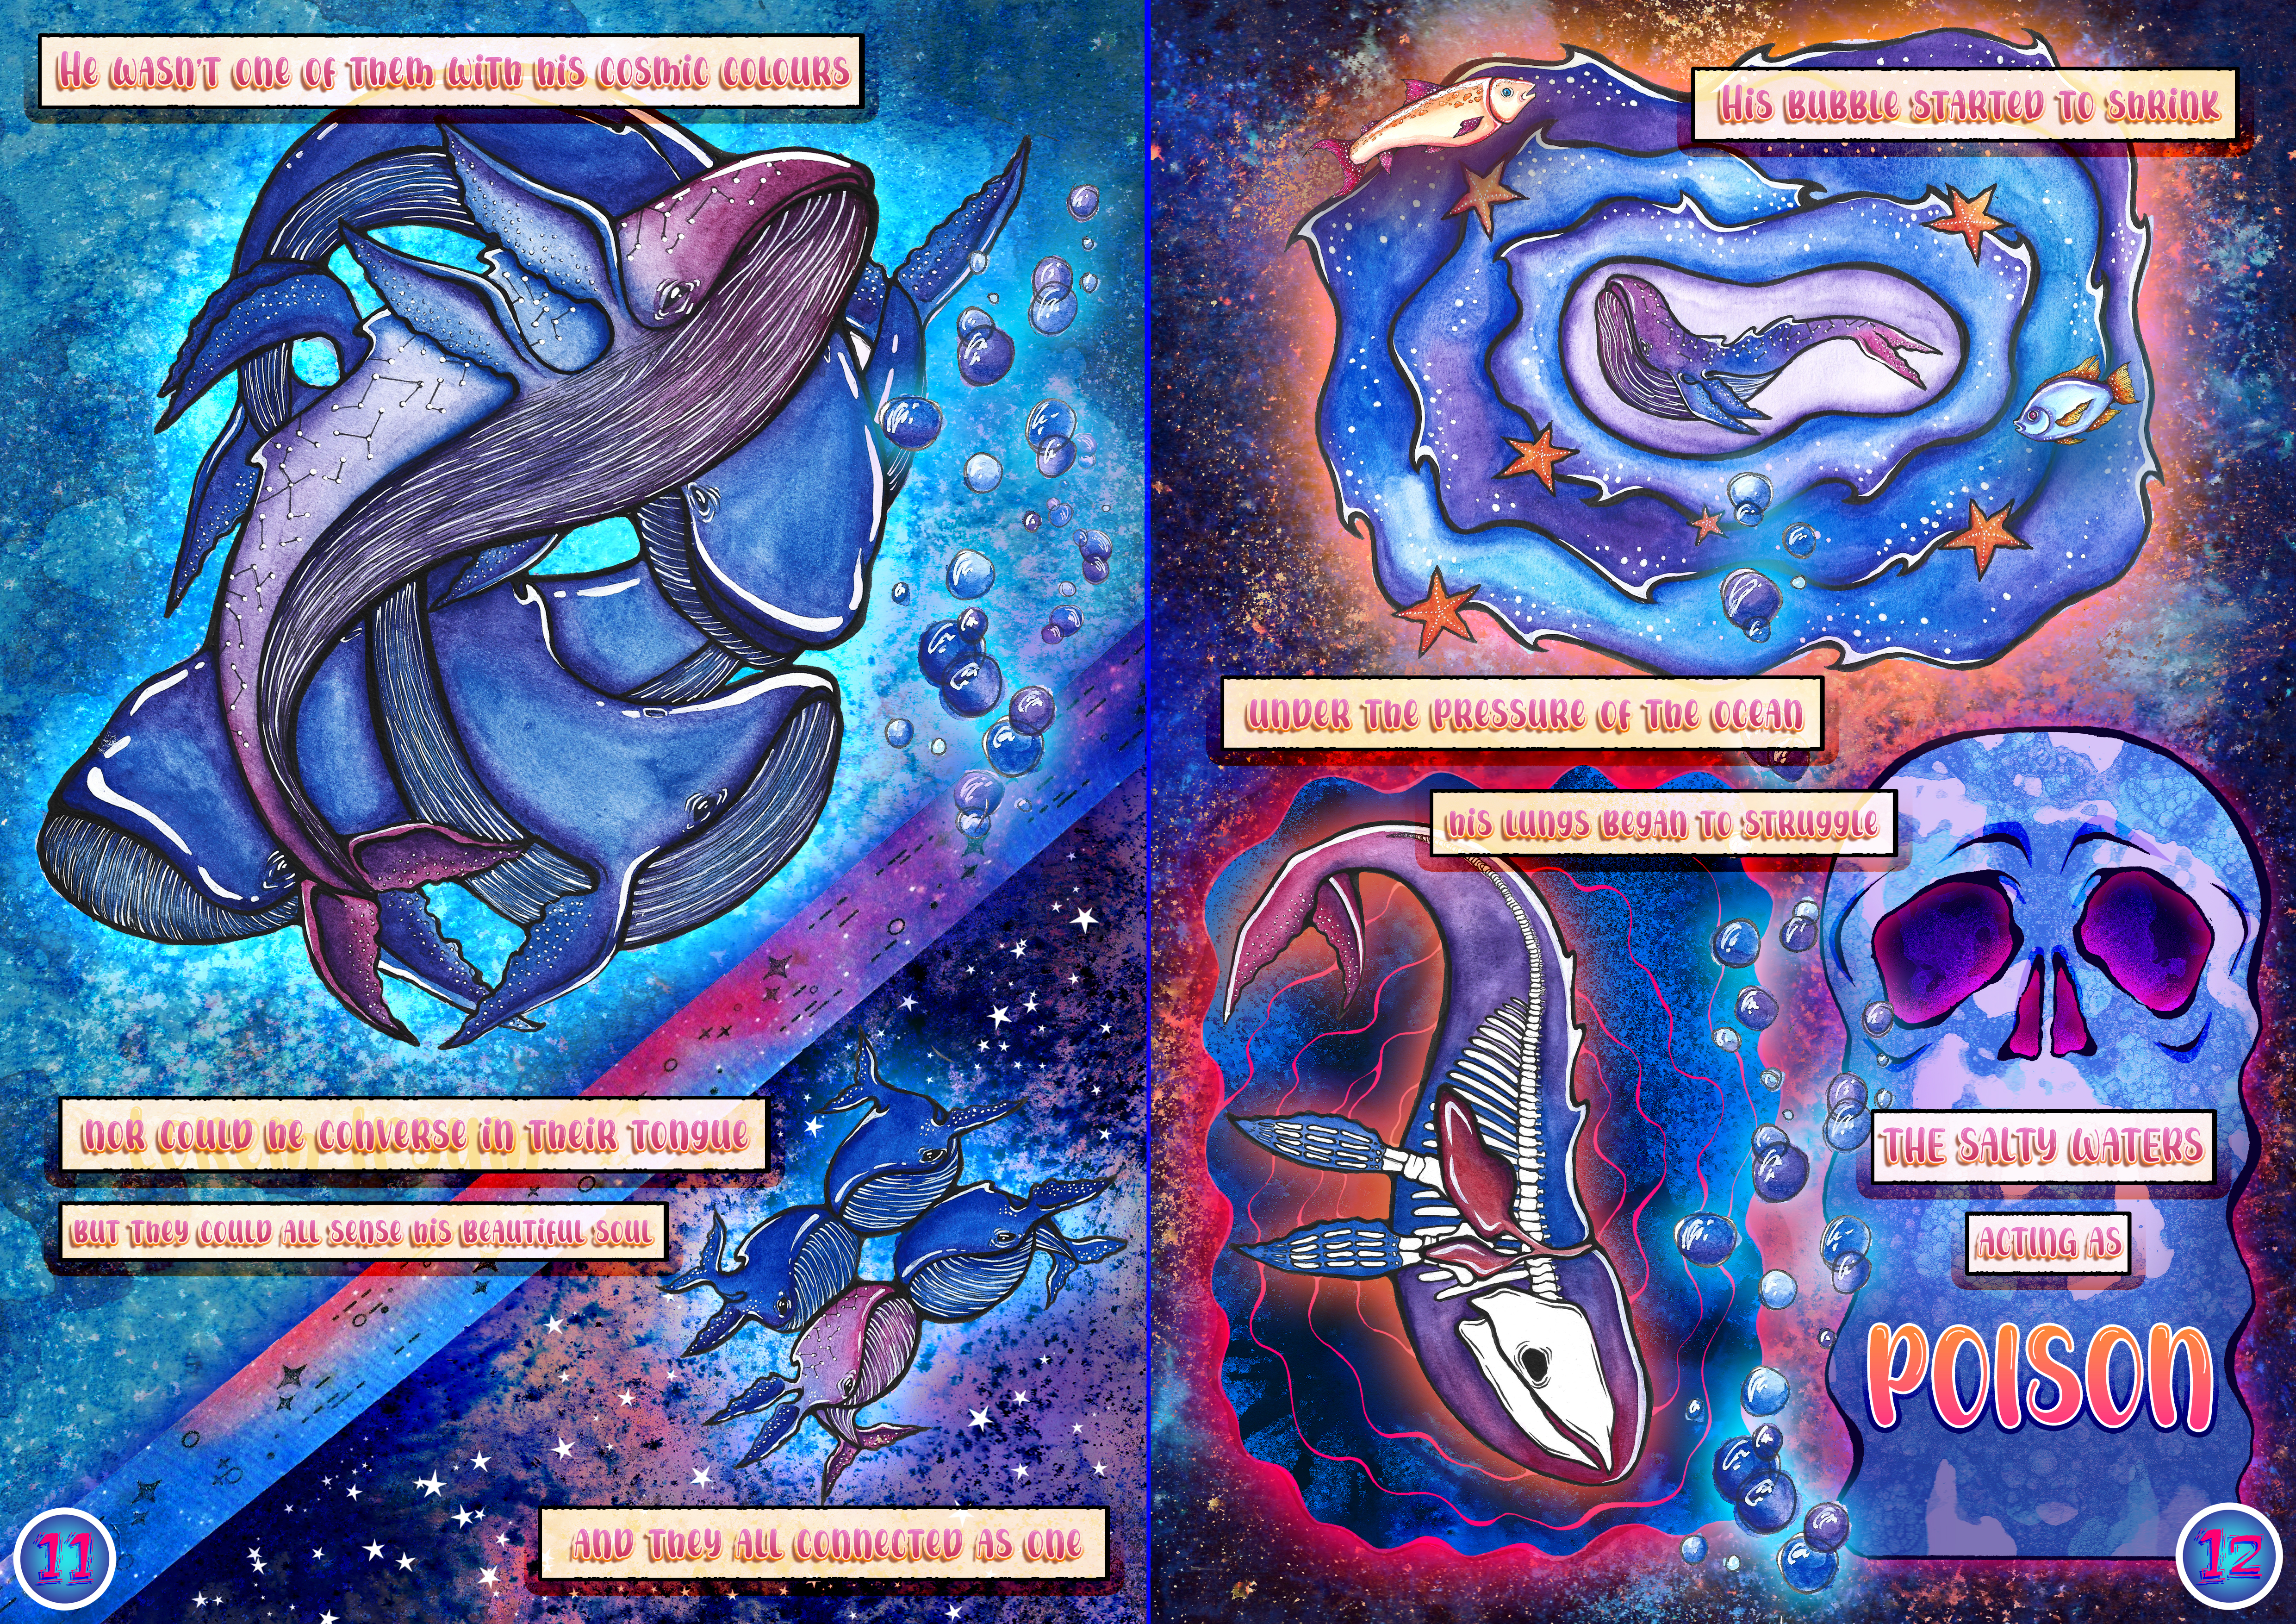
“The Cosmic Whale”
(a slideshow of final pages)
(watercolours, acrylic paints, paint pens, fine liner pens and digital editing)
My final project has come to a close, with the completion of my comic, “The Cosmic Whale”. The comic comprises of 18 pages, including the front and back. I created the comic using multiple mediums, including watercolour, paint pens, ink and digital painting and editing.
Synopsis:
“The cosmic whale is a sentimental story in the form of poetry about a whale from the galaxy who falls to earth and sinks to the bottom of the ocean. It’s at the bottom of the ocean that he’s greeted by earth-whales who comfort him as he lives out his last few minutes in a habitat he could never survive in. It’s a tale about the loneliness we can often feel when we’re faced with new environments and change. And how we can find kindness in strangers in the times you least expect it.”
“The Cosmic Whale”
(a phone recording of the final physical version)
(please change video quality settings to 1080p)
(watercolours, acrylic paints, paint pens, fine liner pens and digital editing)
This is the first full visual-narrative I have completed. I got the pages organised in InDesign to prepare them for printing. I got them printed and then bound the pages using what I learned in a Book Arts visit.
Having it physically on paper and in a book-format was really satisfying and made the accomplishment feel all that more grand for me. I felt like I’d really made something to a semi-professional level and I’ve now learnt how to approach narrative-work in new ways. I’ve been learning how to make a story flow with text-boxes and visuals and I’ve found a real enjoyment for creating sequential art.
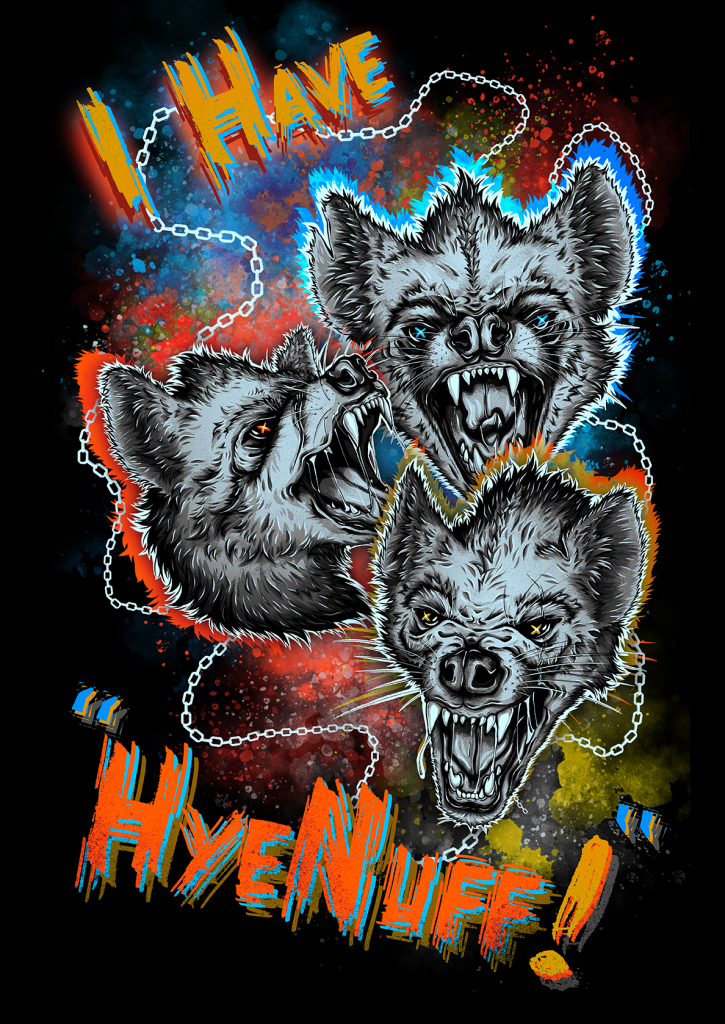
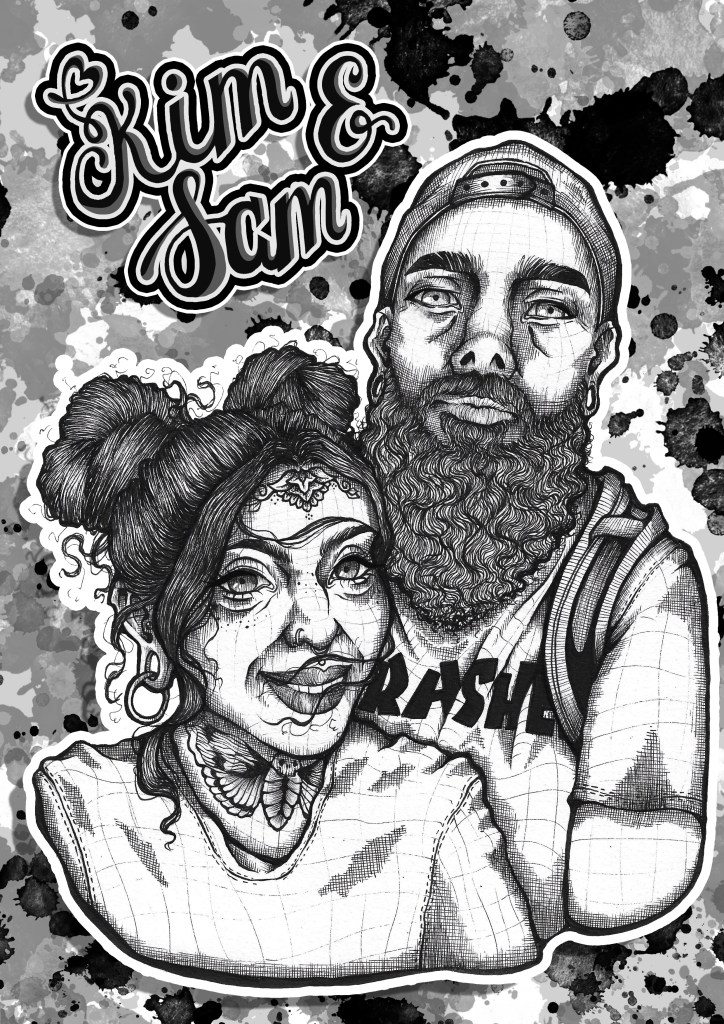
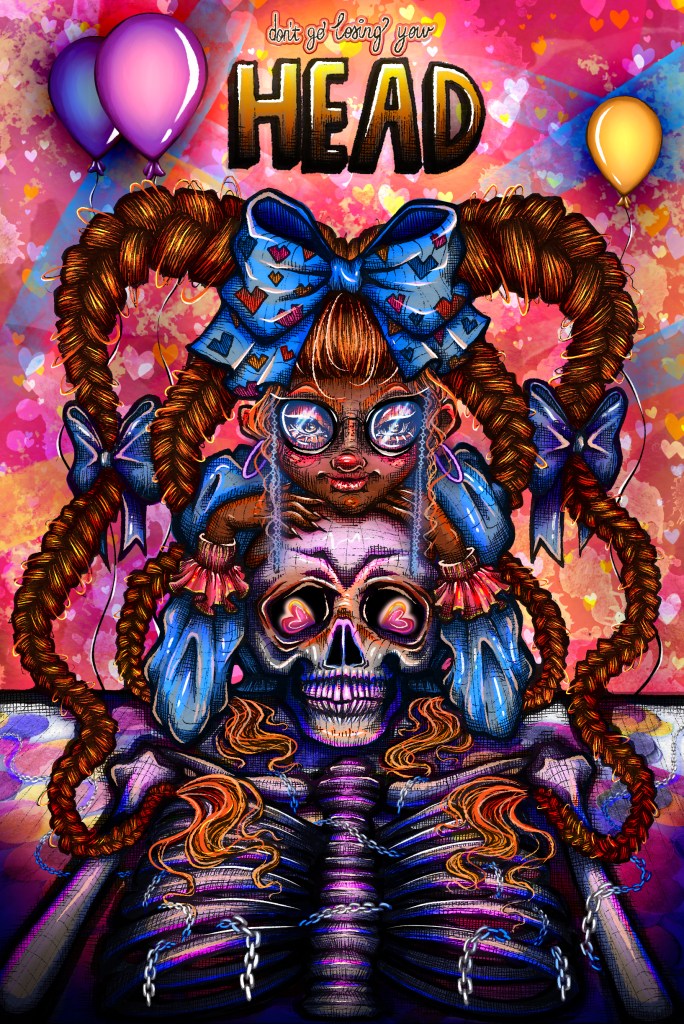
Personal Work
A small selection of the most recent personal work I’ve done in my own time.
(please click on an image to see full resolution)